
Your kitchen island is the hardest-working surface in the house. It's a prep station at 6pm, a homework desk at 7pm, a casual dinner table at 7:30, a wine-and-conversation bar at 9pm, and a breakfast counter again at 7am. And somehow, the lighting above it needs to work for all of that.
The question most homeowners land on — "chandelier or pendant lights?" — sounds like it should have a simple answer. It doesn't. The right choice depends on your island's dimensions, your ceiling height, how open your kitchen is to other rooms, and whether you prioritize even task lighting or a dramatic design statement.
This guide walks you through both options honestly — what each does well, where each falls short, and which one makes sense for your specific layout.
In This Guide
- First: What's the Actual Difference?
- When to Choose a Multi-Light Chandelier (Single Canopy)
- When to Choose Individual Pendants
- The Decision Matrix: Which Is Right for Your Kitchen?
- Sizing: Match the Fixture to Your Island
- Hanging Height: The Same Rule, Different Surface
- Our Top Picks: Multi-Light Chandeliers for Kitchen Islands
- The Open Floor Plan Consideration
- Task Lighting vs Ambient Lighting: What Your Island Actually Needs
- Installation: What to Expect
- Common Mistakes to Avoid
- Your Kitchen Island Lighting Checklist
First: What's the Actual Difference?
The line between "chandelier" and "pendant light" has blurred significantly in modern lighting design, so let's define terms for this guide:
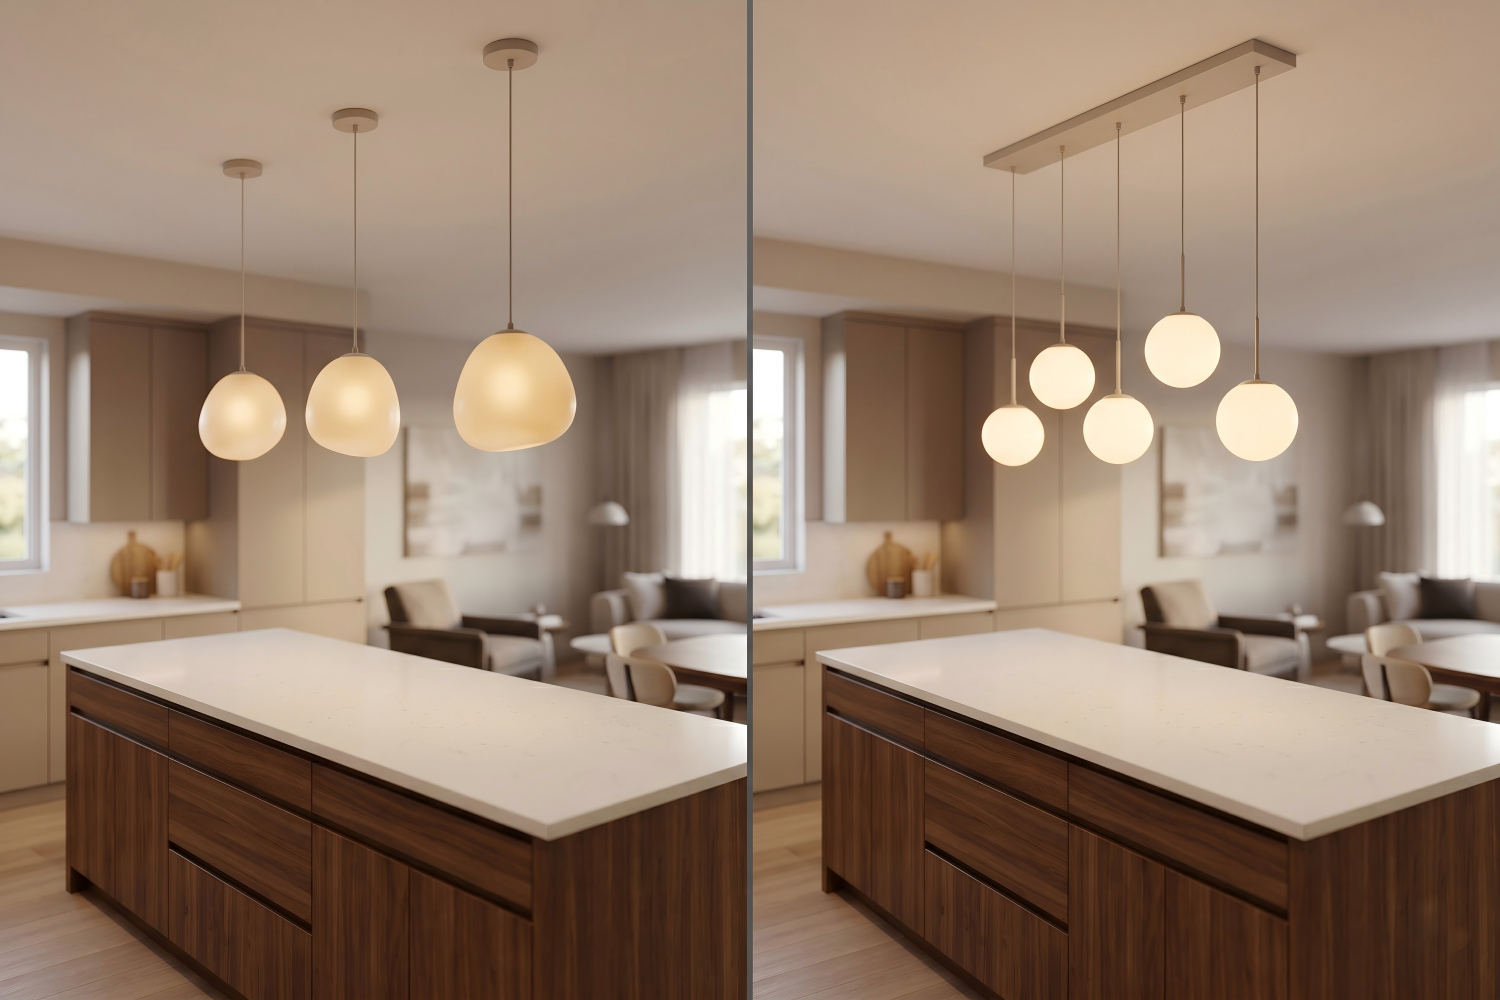
Pendant light: A single light source hanging from one cable or cord. Multiple individual pendants are often installed in a row over an island — each pendant hangs independently from its own ceiling mount. You might hang 2, 3, or 4 individual pendants in a line.
Multi-light pendant / linear chandelier: Multiple light sources hanging from a single canopy (ceiling plate). All the lights connect to one electrical junction box through one mounting point. The canopy can be round (lights radiate outward) or rectangular (lights arrange in a line). This is what most people mean when they say "chandelier over a kitchen island."
Why the distinction matters: Multiple individual pendants require multiple junction boxes in the ceiling — which means either your ceiling already has them, or an electrician needs to add them ($200–$400 per additional box). A multi-light chandelier requires only one junction box — the same single box your current kitchen light already uses. This is often the deciding factor for renovations where budget or ceiling access is limited.
When to Choose a Multi-Light Chandelier (Single Canopy)
A multi-light chandelier over a kitchen island makes sense when:
Your island is 4 feet or longer
Islands under 4 feet can be lit well by 2 individual pendants. But once the island crosses the 4-foot mark, a multi-light chandelier with a rectangle canopy provides more even coverage with less visual clutter on the ceiling. Instead of 3 or 4 separate cables, canopies, and junction boxes, you have one clean ceiling plate with multiple lights spreading from it.
You want a design statement, not just task light
Individual pendants are functional. A multi-light chandelier is functional and sculptural. The collective form — multiple shades at staggered heights, a bold metallic canopy, a cascading arrangement — creates a visual centerpiece above the island that anchors the entire kitchen's design. If your kitchen island is the social hub of your home (and in most American homes, it is), the fixture above it is the jewelry on that hub.
You only have one junction box
This is the practical reality for most retrofit projects. Your ceiling has one electrical box centered over the island. Running additional boxes means opening the ceiling, fishing new wiring, patching drywall, and repainting — easily $500–$1,000+ in electrical and finishing work. A multi-light chandelier turns that single box into 5, 7, 10, or more light points without touching the ceiling.
Your ceiling is high (10+ feet)
In kitchens with tall ceilings, a multi-light chandelier with staggered drop heights fills the vertical space beautifully — the highest pendant reaches toward the ceiling while the lowest sits at task height. Individual pendants at uniform height leave a large empty gap between the ceiling and the fixture line. A staggered chandelier turns that gap into visual interest.
When to Choose Individual Pendants
Separate pendant lights over a kitchen island make sense when:
Your island is under 4 feet
Very short islands (breakfast bars, compact galley kitchen counters) can look overwhelmed by a multi-light fixture. Two small individual pendants at 24–30 inches apart provide sufficient light and visual balance without overpowering a small surface.
You want maximum flexibility in spacing
Individual pendants let you control the exact distance between each light point. If your island has a cooktop on one end and a seating area on the other, you might want tighter spacing over the cooktop (more focused task light) and wider spacing over the seating area (softer ambient glow). A multi-light chandelier's spacing is fixed by the canopy design.
Your ceiling already has multiple junction boxes
If your kitchen was wired (or pre-wired during construction) with 2 or 3 ceiling boxes spaced evenly over the island, individual pendants are the path of least resistance. The boxes are already there — use them.
Budget is the top priority
A pair of single pendants at $219–$289 each is a lower total investment than most multi-light chandeliers, which start around $699. If you're furnishing on a tight budget and plan to upgrade later, individual pendants are an acceptable starting point.
The Decision Matrix: Which Is Right for Your Kitchen?
| Your Situation | Best Choice | Why |
|---|---|---|
| Island 5ft+, one junction box | Multi-light chandelier | One box powers multiple lights, no ceiling work needed |
| Island under 4ft | 2 individual pendants | Multi-light fixture would overpower a small surface |
| High ceiling (10ft+) | Multi-light chandelier, staggered heights | Fills vertical space; individual pendants leave a gap |
| Open concept, island visible from living room | Multi-light chandelier | Stronger design statement visible from across the room |
| Budget under $600 | 2 single Pebbles Pendants ($219–$289 each) | Lower entry cost; upgrade to a chandelier later |
| Already have 3 junction boxes | Individual pendants (or cap 2 boxes, use 1 for chandelier) | Use the infrastructure you already have |
| Want the kitchen to feel "designed" | Multi-light chandelier | Collective form > individual function for design impact |
Sizing: Match the Fixture to Your Island
Whether you choose a chandelier or pendants, the sizing rule is the same. The fixture (or row of fixtures) should span roughly one-half to two-thirds of the island's length — leaving open countertop on each end. This keeps the fixture from extending past the island's edge, which looks proportionally wrong and creates glare for anyone standing at the end.
For individual pendants, the "span" is measured from the first pendant to the last (space them 24–30 inches apart, center to center). For a multi-light chandelier, the span is the canopy length. The table below pairs each island length with the Aurorae fixtures that genuinely land in that range — no guesswork, no fixtures that are too small or too large for the space.
| Island Length | Target Span | Individual Pendants | Multi-Light Chandelier |
|---|---|---|---|
| 3–4 ft (36–48") | 24–32" | 2 × Pebbles Single ($219–$289 each), 24" apart | Modern Opal 5-Light Rect (27.5", $699) |
| 5–6 ft (60–72") | 36–48" | 3 single pendants, spaced evenly | Modern Opal 7-Light Rect (40.5", $899) or Cascade Cone 12-Light Rect (39.3", $1,883) |
| 7–8 ft (84–96") | 48–60" | 4 single pendants, spaced evenly | Linear Crystal Gallery (54", $2,377) or Textured Glass 17-Light Rect (57", $3,499) |
| 9–10 ft (108–120") | 60–80" | 4–5 single pendants, spaced evenly | Two Modern Opal 7-Light Rect (40.5" each, $899 × 2) |
| 10+ ft (120"+) | 80"+ | 5+ pendants or 2 groups | Two Modern Opal 10-Light Rect (45.2" each, $1,299 × 2) |
For islands longer than 8 feet, two evenly spaced fixtures look more balanced — and provide more even light — than a single fixture stretched beyond its proportions. Place each fixture over its own zone (for example, one over the prep area and one over the seating area) with the same spacing logic you'd use for individual pendants.
Hanging Height: The Same Rule, Different Surface
Whether it's a chandelier or pendants, the bottom of the fixture should hang 30–34 inches above the countertop surface.
But kitchen islands introduce a variable that dining tables don't: sightlines. In an open floor plan, the kitchen island is often the visual divider between cooking and living zones. Fixtures hanging too low block the view across the island — you can't see the person cooking from the sofa, and the cook can't see the TV.
The sightline test
- Set the fixtures at 30 inches above the counter (the low end of the range).
- Sit on the living room sofa or the nearest chair that faces the kitchen.
- Can you see clearly under the fixtures to the other side?
- If not, raise the fixtures 1 inch at a time until the sightline is clear.
In most open-concept kitchens, 32–34 inches ends up being the sweet spot — low enough for effective task lighting, high enough for unobstructed sightlines.
Bar-height islands
If your island has a raised bar section (42 inches high instead of standard 36 inches), reduce the hanging height to 28–32 inches above the bar surface. The taller counter already eats into headroom.
Our Top Picks: Multi-Light Chandeliers for Kitchen Islands
Every fixture below offers a rectangle or linear canopy that maps to a kitchen island's proportions, ships with warm white LEDs, and uses materials that wipe clean in a working kitchen. They're ordered from most versatile to most specialized.
Best overall — versatility and value
Modern Opal Glass Globe Chandelier, Rectangle Canopy — from $699
The most versatile kitchen island fixture in our lineup, and the one we recommend first for most homes. Three size options (5, 7, and 10-light), two canopy shapes (round or rectangle), and two finishes (gold and matte black) give you 12 configurations from a single product family. The rectangle canopy arranges the globe pendants in a linear pattern that maps cleanly to island proportions: 5-light Rect (27.5" × 3.93") for 3–4 ft islands, 7-light Rect (40.5" × 3.93") for 5–6 ft islands, 10-light Rect (45.2" × 3.93") for 6–7 ft islands or paired over longer ones. The opal glass globes glow like warm moons at staggered heights, and the frosted surface wipes clean easily — important in a kitchen. At $699 for the 5-light, it's also the most accessible entry into a multi-light island fixture that feels genuinely designed.
Best for: Any island length (3 sizes plus pairing cover 3 ft to 12+ ft), any kitchen style, buyers who want design quality without overspending.
Best for task lighting
Sculptural Brushed Brass Cascade Cone Pendant — from $1,585 (rectangle canopy)
Purpose-built for kitchen islands and dining tables. The brushed brass cones direct light straight down onto the work surface — making this one of the best task-lighting fixtures in the collection, not just a decorative piece. Three rectangle-canopy configurations cover linear islands: 10-light Rect (31.5" × 9.85") at $1,585, 12-light Rect (39.3" × 9.85") at $1,883, and 14-light Rect (47.2" × 9.85") at $2,366. Its maximum height tops out at 75 inches, so it fits standard kitchen ceilings comfortably (most fixtures designed for grand foyers hang too low for a kitchen). The all-metal brushed brass construction also hits the 2026 warm metals trend squarely.
Best for: 4–7 ft islands, contemporary and modern kitchens, cooks who want genuine downward task light from a fixture that still makes a statement.
Best for long islands
Linear Crystal Gallery Chandelier — $2,377
Designed specifically for long kitchen islands and banquet-length dining tables, this fixture arranges 60 K9 crystal elements along a 54-inch linear frame, creating a continuous gallery ribbon of light. It's the one fixture in our collection engineered to hang low over a kitchen: the height adjusts from 18 inches (low-profile) up to 103 inches, so it works in standard 8-foot ceilings as easily as in lofty open-concept kitchens. At 54 inches wide, it spans a 7–9 ft island in a single sweep — no pairing required. The crystal does ask for occasional careful cleaning, so it suits islands set slightly away from the cooktop rather than directly beneath heavy steam.
Best for: 7–9 ft islands, formal and transitional kitchens, homeowners who want one uninterrupted statement instead of two paired fixtures.
Best for modern geometric style
Clustered Tubes Cloud Chandelier — from $999
Clustered glass tubes create a "cloud" of light that's both modern and warm. Available in three finishes (brass, black, and rose gold), with rectangle-canopy options for linear islands: 14-light Rect (27.5" × 13.7") at $999, 24-light Rect (31.5" × 13.7") at $1,805, and 36-light Rect (39.5" × 13.7") at $2,412. The tubular forms create a vertical rhythm — each tube catches and refracts light slightly differently, producing a shimmer that's particularly striking from the side, which is how most people see kitchen island fixtures in open floor plans. The clustered arrangement is dense enough for genuine task lighting, not just decorative glow.
Best for: 3–6 ft islands, modern and minimalist kitchens, homeowners who prefer geometric forms over organic shapes.
Best for adjustable task + ambient light
Modern Ice Cube Glass Pendant — from $892 (rectangle canopy)
Hand-crafted glass cubes with an internal bubble texture that evokes frozen water. The 8-light rectangle canopy (27.5" × 15.7") at $892 suits 3–4 ft islands. What sets the Ice Cube apart for kitchens is the choice of color temperature at purchase: 2700K warm white for a cozy ambiance, or 6000K cool white for crisp, daylight-like task illumination over a prep-heavy island. Both ship at CRI >90 for accurate color rendering when you're checking whether the chicken is done or the greens are fresh.
Best for: 3–4 ft islands, bar areas, prep-focused kitchens where bright, accurate task light matters as much as looks.
Best for organic / artisan style
Cascading Textured Glass Chandelier — from $1,799 (rectangle canopy)
Hand-blown textured glass shades at staggered heights create a cascading waterfall effect that's equal parts art and illumination. Each shade carries unique surface patterns from the hand-blowing process — a direct expression of the hand-blown glass trend defining 2026 design. Two rectangle configurations suit linear islands: 10-light Rect (45.2" × 13.7") at $1,799 for 6–7 ft islands, and 17-light Rect (57" × 17.7") at $3,499 for 8–9 ft islands. The textured surface scatters light in soft, organic patterns across the countertop and surrounding walls, giving a kitchen the warm, layered atmosphere of a gathering place rather than a work zone.
Best for: 6–9 ft islands, farmhouse / transitional / bohemian kitchens, homeowners who value handcraft and one-of-a-kind character.
Best for an artistic statement
Hand-Sculpted Ceramic Bloom Chandelier — $4,872 (rectangle canopy, 56-light)
Dozens of individually hand-shaped ceramic petals cluster into a form that looks like a flower in mid-bloom. This is the fixture that turns a kitchen island into a gallery. The ceramic is warm and matte — a deliberate contrast to the glossy surfaces and stainless steel typical of kitchens. For a linear island, the 56-light rectangle canopy (39.4" × 19.7") at $4,872 spans a 5–6 ft island with full ceramic-petal coverage; smaller ellipse-canopy configurations from $2,522 work as focal clusters over compact islands. It's not the right choice for every kitchen, but for the homeowner who wants their kitchen to feel like a creative, personal space rather than a showroom, there's nothing else like it.
Best for: Statement kitchens in large homes, art-forward interiors, the homeowner who wants guests to photograph the fixture and ask where it came from.
Best budget entry point
Pebbles Pendant Light — from $219 (single)
Hand-blown organic glass pebble forms at the most accessible price in our pendant collection. Three single-pendant sizes — S globe at $219, M globe at $259, L globe at $289 — let you hang a pair or trio over a compact island for a thoughtfully designed look without a multi-light price tag. For a single-canopy cluster, the 3-Light Round Canopy ($719, one S, one M, one L globe at staggered heights) makes a compact focal point. The organic shapes feel warm and approachable — no sharp edges, no rigid geometry, just smooth, river-stone-inspired glass glowing from within. At $219 each, a pair of single Pebbles Pendants comes in under $600 — less than the cost of a single mid-range chandelier — and still looks intentional.
Best for: Islands under 4 feet, breakfast bars, compact kitchens, budget-conscious first-home buyers.
The Open Floor Plan Consideration
In open-concept homes — which represent the majority of American kitchens built or renovated in the last 15 years — the kitchen island fixture is visible from the dining area, the living room, and sometimes the entryway. It's not just a kitchen light; it's a design element in three rooms simultaneously.
This has three implications:
1. The fixture needs to coordinate (not match) with other room chandeliers
If you have a chandelier over the dining table or a statement fixture in the adjacent foyer — say the Multi-Arm Opal Glass Chandelier, one of our most specified fixtures for dining rooms and two-story entries — you don't need the identical fixture over the island. But the materials, finishes, and warmth should be in the same family. Glass + glass works. Brass + brass works. Crystal dining room + rustic iron kitchen pendants does not.
The easiest way to coordinate: choose fixtures from the same material family. Our opal glass fixtures (Modern Opal Globe over the island, Multi-Arm Opal in the dining or foyer zone) share the same frosted glass warmth and read as a coordinated set across an open floor plan, even in different forms.
2. The fixture must look good from the side
Most people viewing the island fixture are not standing directly under it — they're seated in the living room or standing in the dining area, looking across. This side view is what they see most often. Flat fixtures (flush-mount style) or very compact pendants disappear from this angle. Fixtures with staggered drop heights or cascading elements create a visible silhouette from every angle in the open floor plan.
3. Color temperature must be consistent
If your dining room chandelier produces 2700K warm white and your island pendants produce 4000K cool white, the open floor plan will look like two different rooms spliced together. Keep all fixtures in the connected space within 300K of each other. Most Aurorae fixtures ship at 2700K warm white (with select crystal designs at 3000K, and the Ice Cube offering a 6000K cool-white option), all at CRI >90 — so a little planning keeps your open floor plan visually seamless.
Task Lighting vs Ambient Lighting: What Your Island Actually Needs
A common misconception: "The island chandelier should be bright enough to cook under." In reality, the island fixture serves a dual role, and the best results come from layering two types of light:
The chandelier provides ambient light — warm, diffused, mood-setting. It creates the inviting atmosphere that makes people gather around the island. Set it to 50–70% brightness for casual evenings and meals.
Under-cabinet LED strips provide task light — bright, focused, shadow-free illumination directly on the countertop where you're chopping, measuring, and reading recipes. Turn them on during active cooking, off when the work is done.
Together, these two layers give you a kitchen that's functional for cooking and beautiful for entertaining. Neither layer alone does both jobs well. If you make the chandelier bright enough for chopping onions (100% brightness, close to the counter), it's too harsh and glaring for dinner conversation. If you dim it for ambiance, the countertop is too dark for safe food prep.
The dimmer switch is what makes this work seamlessly. A Lutron Diva ($25–$40) or Lutron Caséta (~$60) lets you dial between "cooking mode" (80–100%) and "entertaining mode" (40–60%) with one touch. Every Aurorae fixture is Lutron-verified for smooth, flicker-free dimming.
Installation: What to Expect
If you already have one junction box centered over the island
A multi-light chandelier installs just like any single light fixture — mount the bracket, connect the wires, hang the fixture. Standard installation cost: $150–$400 including dimmer swap.
If you have no junction box over the island
An electrician needs to add one — running a new circuit from the panel or extending an existing circuit from a nearby box. Cost: $300–$600 for the new box plus the fixture installation.
If you have 3 junction boxes and want to switch to a single chandelier
The electrician will use one box for the chandelier and cap the other two (cover them with blank plates). The unused boxes can be removed and the ceiling patched, or simply left capped — both are code-compliant. Cost: standard installation $150–$400, plus $100–$200 for patching if you want the extra boxes fully concealed.
Common Mistakes to Avoid
Mistake 1: Fixtures too close together (individual pendants)
When hanging multiple individual pendants, space them 24–30 inches apart (center to center). Closer than 24 inches and they look crowded; wider than 30 inches and the light between them drops off, creating dark spots on the counter.
Mistake 2: Fixture extends past the island edge
The fixture (or row of fixtures) should never extend past the ends of the island. Leave at least 6 inches of countertop visible beyond the outermost light on each side. A fixture that overhangs the island creates glare for people standing at the end and looks disproportionate.
Mistake 3: Ignoring the cooktop vent
If your island has a cooktop with an overhead range hood, the vent hood is the dominant visual element above the island — not the chandelier. In this layout, place pendant lights or a chandelier only over the non-cooktop section of the island. Competing with a range hood for visual attention is a battle the chandelier will lose.
Mistake 4: Choosing fixtures that are hard to clean in a kitchen
Kitchens produce grease, steam, and cooking particulates. Over time, these settle on light fixtures. Choose materials that wipe clean easily — opal glass, frosted glass, and brushed metals are all kitchen-friendly. Intricate crystal fixtures with dozens of small elements are beautiful but ask for more careful cleaning, so reserve them for islands set slightly away from a cooktop. A quick wipe with a damp microfiber cloth should be all that the easy-clean materials need.
Your Kitchen Island Lighting Checklist
- Measure your island length.
- Count your junction boxes. One box = multi-light chandelier. Multiple boxes = individual pendants or chandelier (cap extras).
- Choose your direction. Design statement → multi-light chandelier. Maximum flexibility → individual pendants. Best of both → multi-light with rectangle canopy.
- Size the fixture. Span should be one-half to two-thirds of island length. Over 8 ft, consider two fixtures.
- Set the height. 30–34 inches above countertop. Do the sightline test from the living room.
- Install a dimmer. Cooking mode at 80–100%, entertaining mode at 40–60%.
- Add under-cabinet task lighting. The chandelier handles ambiance; LED strips handle the chopping.
Ready to light your island? Browse our Pendant Light Collection and Chandelier Collection — every fixture includes dimmable warm white LEDs at CRI >90 and Lutron-verified dimming compatibility. The Cascade Cone offers cable up to 75 inches, covering kitchens with ceilings up to 12 feet, while the Linear Crystal Gallery adjusts from a low-profile 18 inches for standard ceilings. UL Listed (File #E321074) for US & Canada, CE certified for European markets. Not sure which style fits your kitchen? Email us a photo of your island and kitchen — include the island length and ceiling height — and we'll recommend specific fixtures for your layout.
Related Guides
- Chandelier Size Guide for Dining Rooms
- Chandelier Shape Guide: Match Your Chandelier to Your Table
- How High to Hang a Chandelier: Room-by-Room Height Guide
- Chandelier Color Temperature Guide: 2700K vs 3000K vs 4000K
- Chandelier Installation Cost Guide [2026]: DIY vs Electrician
- 2026 Chandelier Trends: 5 Styles Defining Modern Interiors

