
Here is something many homeowners overlook: your chandelier was not designed to be the only light in the room.
It sounds almost heretical coming from a lighting brand. But it's the truth — and understanding it is the difference between a room that feels "well-lit" and a room that feels designed.
A chandelier is an anchor. It sets the mood, creates a focal point, and provides the foundational layer of warm ambient light. But on its own, it leaves corners dark, creates unflattering overhead shadows on faces, and forces you to choose between "too bright for dinner" and "too dim to read the menu."
Professional designers solve this with layered lighting — three distinct types of light working together to create depth, reduce shadows, and give you complete control over how a room feels at any moment of the day. This guide shows you how to build that system room by room, with your chandelier as the starting point.
In This Guide
- The Three Layers: A Quick Framework
- Room-by-Room Layered Lighting Recipes
- Dining Room
- Living Room
- Kitchen
- Foyer & Entryway
- Staircase
- The Dimmer: Your Layered Lighting Remote Control
- The Most Common Layering Mistakes
- Start With the Chandelier. Build Around It.
- Frequently Asked Questions
The Three Layers: A Quick Framework
Think of layered lighting like cooking. Ambient light is the base — the stock or the sauce that everything else builds on. Task light is the seasoning — focused, functional, targeted. Accent light is the garnish — the detail that elevates the dish from good to memorable.
Layer 1: Ambient Light (your chandelier)
Ambient light is the general, room-filling illumination that lets you see and move safely. It's the light you notice when you walk into a room and can tell whether it feels warm or cold, bright or dim. Your chandelier provides this layer. It typically accounts for 50–60% of the room's total illumination — enough to set the mood and establish warmth, but not enough to handle every task.
Ambient light should be diffused, not directional. This is why opal and frosted glass chandeliers work so well as ambient anchors — the glass scatters light in every direction, creating a soft, even glow without harsh hotspots or glare. A chandelier with exposed bulbs, by contrast, creates defined shadows and bright points that work as decorative accent but less effectively as room-filling ambient light.
Layer 2: Task Light (lamps, under-cabinet lights, reading lights)
Task light is focused illumination where you need to do something — read, cook, apply makeup, work at a desk. It's brighter and more directional than ambient light, aimed at a specific surface or area.
Examples of task lighting:
- Table lamps and floor lamps — next to a reading chair, on a desk, flanking a sofa
- Under-cabinet kitchen lights — illuminating countertops for food prep
- Vanity lights — flanking a bathroom mirror for grooming
- Desk lamps — focused beam for home office work
- Recessed can lights (downlights) — directed at kitchen counters, artwork, or walkways
Task lighting should be independently switchable from your ambient chandelier. You want to be able to turn on the reading lamp without brightening the entire room, or turn off the under-cabinet lights when you move from cooking to dining.
Layer 3: Accent Light (wall sconces, picture lights, LED strips)
Accent lighting is the most often overlooked layer — and the one that separates a professionally designed room from a merely well-lit one. Its job is to create depth, highlight architectural features or artwork, and add warmth to the room's perimeter.
Examples of accent lighting:
- Wall sconces — flanking a fireplace, lining a hallway, framing a mirror
- Picture lights and gallery lights — illuminating artwork or photography on walls
- LED strip lights — inside glass cabinets, under floating shelves, along toe kicks, behind TVs
- Uplights — floor-level fixtures aimed upward to wash a wall or highlight a plant
- Candles — yes, candles count as accent lighting (and they're still the best)
Accent lighting typically operates at lower intensity than ambient or task light. It's felt more than seen — it adds warmth and visual interest without drawing attention to itself. A room without accent lighting feels flat, like a photograph taken with a flash. A room with accent lighting feels three-dimensional, like the same photograph taken in natural light.

Room-by-Room Layered Lighting Recipes
Here's how to apply the three-layer framework to the rooms where chandeliers and pendants are most commonly installed.
Dining Room
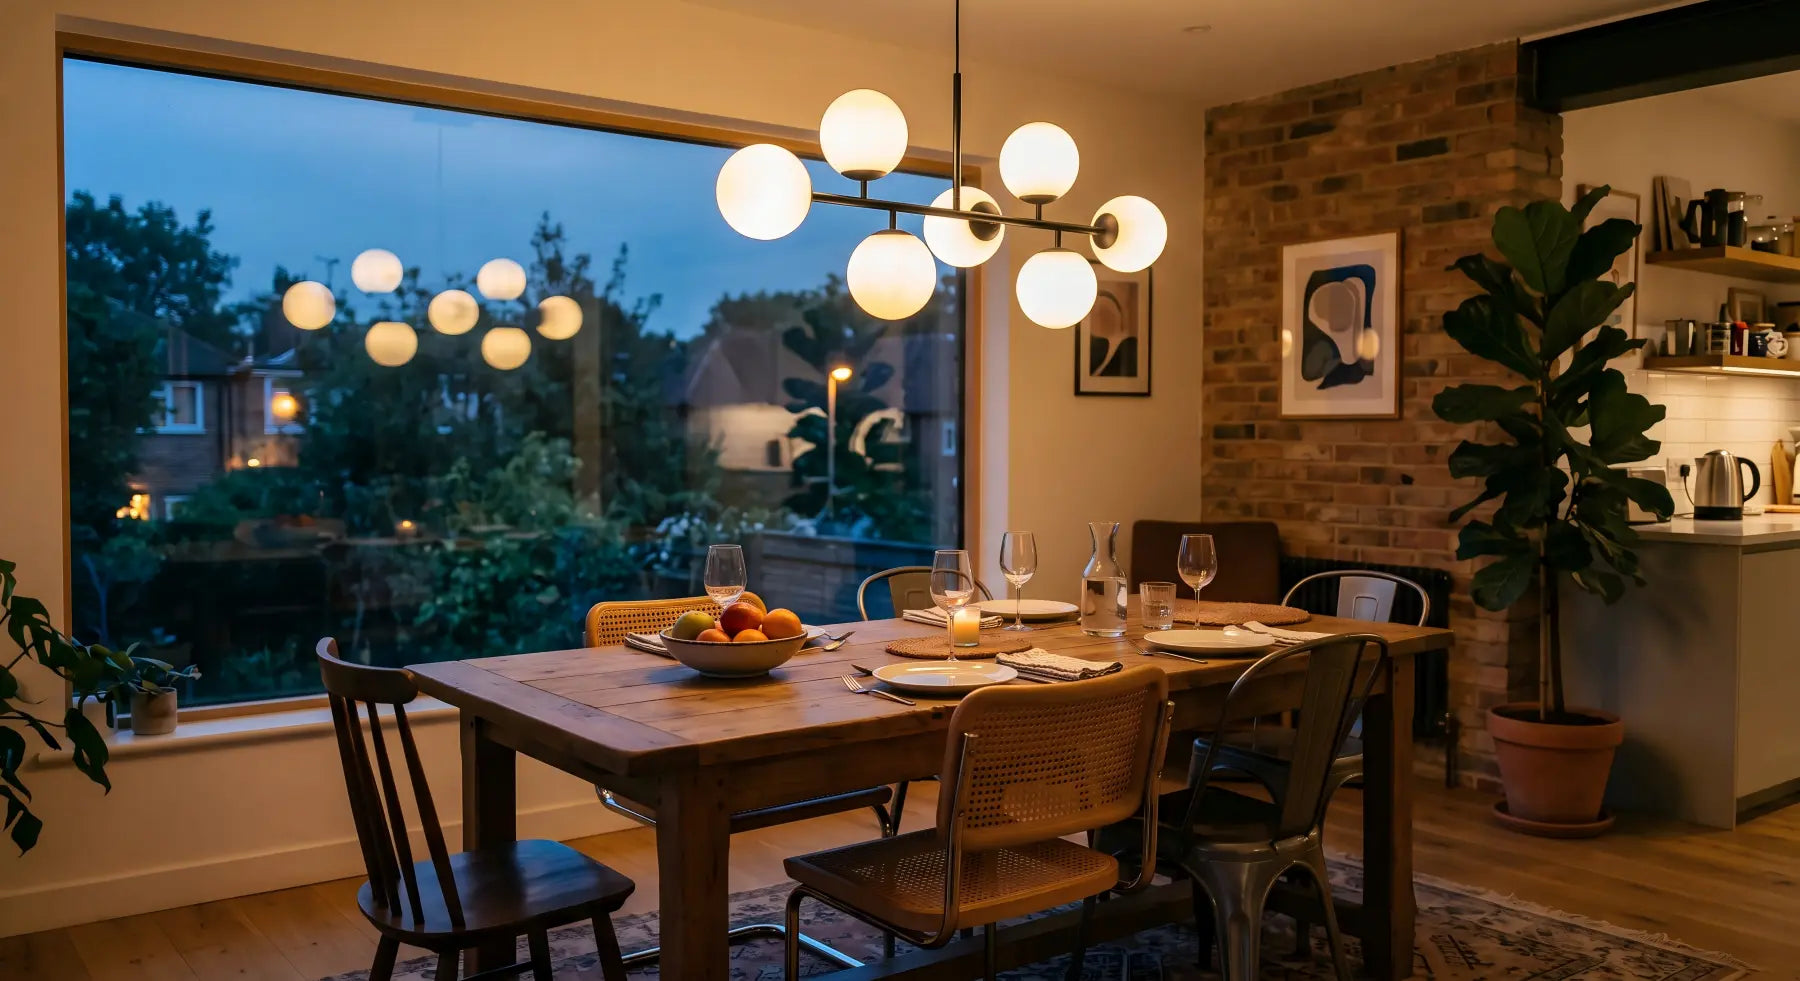
The dining room is the easiest room to layer well — and the one where layered lighting makes the most dramatic difference in how your dinners feel.
The recipe
| Layer | Fixture | Purpose | Setting |
|---|---|---|---|
| Ambient | Chandelier over dining table | Warm, flattering glow that makes food and faces look beautiful | Dimmed to 60–70% for daily meals |
| Accent | Wall sconces on 1–2 walls | Warms the perimeter and adds depth | Dimmed to 40–50% |
| Accent | Buffet lamp or console table lamp | Creates a warm anchor on the sideboard | Always on during meals |
Why no task lighting?
The dining room is one of the few rooms where task lighting isn't needed. You're not performing precision work here — you're eating, talking, and enjoying the company. The chandelier and accent lights together provide more than enough illumination for dining. This is actually what makes the dining room the easiest room to light well: two layers instead of three.
The dinner party secret
When guests are coming, dim the chandelier to 35–40% and turn on the accent sconces at about 30%. Light candles on the table. The room transforms from "weeknight family dinner" to "intimate restaurant." The total light output drops, but the quality of light improves dramatically — warm, multi-directional, flickering, layered. This is the experience that makes people say "your home feels so inviting" without being able to pinpoint exactly why.
Our chandelier picks for dining rooms
- Opal Glass Globe Chandelier ($699+) — Diffused opal glass reduces glare, creating the soft ambient base that the entire dining experience builds on. Available in 5, 7, and 10-light configurations with round or rectangle canopy to match your table shape.
- Luminous Waves Chandelier ($997+) — Hand-blown frosted wave glass adds sculptural character above the table while still providing beautifully diffused ambient light.
Living Room
The living room is the most complex room to layer because it serves the most functions: watching TV, reading, conversation, entertaining, working on a laptop, and sometimes just staring at the ceiling thinking about nothing. Each activity needs different light.
The recipe
| Layer | Fixture | Purpose | Setting |
|---|---|---|---|
| Ambient | Chandelier or large pendant centered over seating area | Defines the "ceiling" of the living zone and provides base warmth | Dimmed to 50–70% |
| Task | Floor lamp next to reading chair | Focused light for reading or handwork | On only when reading |
| Task | Table lamps flanking the sofa | Supplementary ambient + focused light for conversations | Dimmed to 50–60% |
| Accent | Picture lights above artwork | Highlights your art and draws the eye to the walls | Always on in the evening |
| Accent | LED strip behind TV or under floating shelves | Reduces eye strain during TV viewing and adds ambient warmth | On during screen time |
The "3–5 source" rule
Professional designers use a simple rule of thumb for living rooms: every living room needs 3–5 independently controllable light sources. Not 3–5 bulbs — 3–5 separate fixtures on separate switches or plugs. This gives you enough combinations to create distinct moods without any single fixture needing to do everything.
At minimum: chandelier + two table lamps + one accent. That's four sources. On a typical evening, you might have the chandelier dimmed to 50%, both table lamps on, and the picture light illuminating the wall. For movie night, the chandelier drops to 15%, the table lamps go off, and only the LED strip behind the TV stays on. Same room, completely different experience — controlled by which sources you activate, not by a single dimmer.

Our chandelier picks for living rooms
- Opal Glass Globe Chandelier – 7 Light, Round Canopy ($899) — The round canopy creates an even light spread over the seating area, and opal glass keeps glare low from every angle on the sofa.
- Textured Glass Orb Chandelier ($1,175) — For living rooms that need more visual weight. The textured glass orbs create interesting light patterns on the ceiling that add depth to the ambient layer.
Kitchen
Kitchens need more layers than any other room because they combine high-precision task work (chopping, cooking, reading recipes) with social gathering (island conversations, casual meals) — often happening simultaneously.

The recipe
| Layer | Fixture | Purpose | Setting |
|---|---|---|---|
| Ambient | Recessed can lights (ceiling downlights) | General room brightness for safety and navigation | Dimmed to 70% during cooking, 40% during dining |
| Task / Ambient | Pendant lights over kitchen island | Focused light for food prep + visual centerpiece | 100% during cooking, 50–60% for casual meals |
| Task | Under-cabinet LED strip lights | Bright, shadow-free illumination of countertops | On during food prep, off otherwise |
| Accent | In-cabinet lighting (glass-front cabinets) | Showcases glassware and dishes; adds perimeter warmth | Always on in the evening |
| Accent | Toe kick LED strips (under base cabinets) | Subtle ground-level glow; great for midnight snack runs | On a motion sensor or manual switch |
A note about kitchen color temperature
The kitchen is the one room where color temperature might intentionally vary between layers. Recessed cans and under-cabinet strips can go slightly cooler (3000K) for better task visibility and accurate color judgment during food prep. But the island pendants — the fixtures that are most visible and set the room's emotional tone — should stay warm at 2700K. The 300K difference between layers is subtle enough to be invisible but functionally meaningful: cool where you need precision, warm where you want ambiance.
Our pendant picks for kitchen islands
- Pebbles Pendant Light ($219+) — Organic hand-blown glass clusters at the most accessible price point. Compact forms won't block sightlines across an open kitchen. Perfect starting point for a layered kitchen plan.
- Cascade Cone Pendant ($1,585+) — Sculptural brushed brass cones that make a stronger design statement while directing light downward onto the work surface.
- Cubes LED Pendant ($1,532+) — Geometric crystal cubes for a bold, architectural look that pairs well with modern and minimalist kitchen designs.
Foyer & Entryway
The foyer lighting plan has one job: create a warm, impressive welcome in a transitional space that people pass through in seconds.
The recipe
| Layer | Fixture | Purpose | Setting |
|---|---|---|---|
| Ambient | Chandelier (statement piece) | The focal point and emotional anchor of the entry | Dimmed to 80% when guests are expected |
| Accent | Wall sconces flanking a mirror or console | Adds wall-level warmth so the entry doesn't feel like a spotlight from above | 50–60% |
| Accent | Table lamp on console/entry table | Low-level warm glow that makes the entry feel furnished and lived-in | Always on when home |
The 80% rule for foyers
Most designers set foyer chandeliers to 80% brightness, not 100%. Here's why: full brightness in a small transitional space can feel aggressive — you walk in from the dark outside and get hit with a wall of light. At 80%, the chandelier still commands attention and fills the space with warmth, but the transition from exterior darkness to interior light feels gradual and welcoming rather than jarring.
This is especially important for open houses and home showings — real estate agents consistently set foyer lights below maximum to create that "warm welcome" feeling that influences buyers' first impressions.
Our chandelier picks for foyers
- Multi-Arm Opal Glass Chandelier ($899+) — Dramatic arm design fills the vertical space of standard and high-ceiling foyers. Black finish grounds the fixture against light-colored walls.
- Artisanal Crystal Sphere Chandelier ($885+) — A single luminous sphere that creates an immediate focal point in the entry. The frosted inner core produces a "light within light" effect that visitors remember.
- Grand Cascading Crystal Chandelier ($993) — Multi-tier prismatic crystal that fills foyers with sparkle. The vertical cascade draws the eye upward through the full ceiling height.
Staircase
Staircases are the one space where the chandelier does almost everything. The vertical geometry means wall sconces and accent lights compete for attention rather than complement the fixture. Keep it simple.
The recipe
| Layer | Fixture | Purpose |
|---|---|---|
| Ambient + Accent | Cluster pendant or cascading chandelier | Fills the vertical void with light at multiple heights as you ascend |
| Task (optional) | LED step lights (in the stair risers) | Safety lighting for nighttime navigation. Small, recessed, warm-toned. |
A well-chosen cluster pendant in a stairwell essentially handles all three layers simultaneously — the staggered heights create ambient fill, the individual glass elements provide visual accent, and the overall brightness serves the task of safely navigating the stairs.
Our picks for staircases
- Cascading Acrylic Orb Chandelier ($1,217+) — 10-foot adjustable configuration creates a cascading constellation that follows the staircase line.
- Slim Glass Cascading Pendant ($386+) — Sleek, slim glass tubes at staggered heights for a more minimal stairwell statement at a lower price point.
The Dimmer: Your Layered Lighting Remote Control
A layered lighting plan without dimmers is like having a piano with only two keys — loud and off. Dimmers give you the full keyboard.
The ideal setup: every layer on its own dimmer or switch. This lets you create "scenes" — preset combinations that match different activities:
| Scene | Chandelier | Task Lights | Accent Lights | Feeling |
|---|---|---|---|---|
| Morning routine | 100% | All on | Off | Bright, energizing, functional |
| Weeknight dinner | 60–70% | Off | Sconces at 50% | Warm, comfortable, relaxed |
| Dinner party | 35–40% | Off | Sconces at 30% + candles | Intimate, flattering, special |
| Movie night | 10–15% | Off | TV backlight only | Dark, cozy, cinema-like |
| Hosting / open house | 80% | Selective | All on at 60% | Bright but warm, impressive |
| Late night (wind down) | Off | One table lamp | Off | Minimal, circadian-friendly |
With a smart dimmer system like Lutron Caséta Wireless (~$60 per switch), you can save these scenes in the app and activate them with one tap — or with voice commands through Alexa, Google Home, or Apple HomeKit. "Alexa, set Dinner Party mode" dims your chandelier to 40% and your sconces to 30% simultaneously.
All Aurorae Lighting chandeliers are compatible with Lutron Diva and Caséta dimmers and dim from 100% down to 10%.
The Most Common Layering Mistakes
Mistake 1: All overhead, nothing at eye level
A room with only ceiling-mounted lights — even beautiful ones — feels flat. Light from above creates shadows under your eyes, nose, and chin (think unflattering overhead office lighting). Adding light sources at eye level (table lamps, sconces) fills in those shadows and makes people look dramatically better. If your room currently has only a chandelier and recessed cans, adding two table lamps will change the room more than any fixture upgrade.
Mistake 2: Every light on the same switch
If your chandelier and recessed lights are wired to the same switch, you lose all control. You can't dim the chandelier for dinner while keeping the recessed cans bright for cleanup. You can't turn off the overhead while keeping table lamps on for reading. Each layer should be independently controllable — even if it means hiring an electrician to split a circuit into two switches ($150–$250).
Mistake 3: Forgetting the perimeter
Most homes concentrate light in the center of the room and leave the walls dark. This makes the room feel smaller than it is — your eye stops at the shadow boundary instead of traveling to the actual wall. Accent lights on the perimeter (sconces, picture lights, shelf lights) push the visual boundaries outward. The room literally feels larger when the walls are gently lit.
Mistake 4: Mixing color temperatures between layers
If your chandelier is 2700K (warm golden) but your recessed cans are 5000K (cool blue-white), the room will look confused — warm in the middle, cold at the edges. Keep all layers within 300K of each other. A 2700K chandelier works beautifully with 3000K accent lights. A 2700K chandelier next to 4000K recessed cans does not.
Start With the Chandelier. Build Around It.
If you're starting from scratch or renovating, here's the order that makes layered lighting easiest to plan:
- Choose the chandelier first. It's the visual anchor — its style, finish, and color temperature set the direction for everything else. Browse our Chandelier Collection and Pendant Light Collection.
- Add task lighting where you do things. Reading spots, kitchen counters, desks. Match the warmth (2700–3000K) and ensure independent switching.
- Add accent lighting at the perimeter. Wall sconces, picture lights, cabinet lights, LED strips. This is the layer that elevates the room from "well lit" to "designed."
- Install dimmers on everything possible. Even a $25 Lutron Diva on the chandelier circuit transforms your control over the room.
- Live with it for a week, then adjust. You'll quickly discover which scenes you use most. Tweak dimmer levels until the default feels perfect for your daily routine.
The chandelier is the anchor. The layers are the symphony. And the dimmer is the conductor.
Need help choosing the right chandelier to start your layered lighting plan? Email our lighting consultants with a photo of your room and your ceiling height — we'll recommend the ideal ambient anchor for your space.
Frequently Asked Questions
What is layered lighting?
Layered lighting is a design strategy that combines three types of light in a room: ambient (general room-filling light, typically from a chandelier or overhead fixture), task (focused light for activities like reading or cooking, from lamps or under-cabinet lights), and accent (decorative light that highlights walls, art, or architecture, from sconces, picture lights, or LED strips). Together, these three layers create a room that feels professionally designed with depth, warmth, and flexibility.
Is a chandelier enough to light an entire room?
No. A chandelier is designed to provide ambient lighting — the warm, diffused base layer that accounts for about 50–60% of a room's illumination. On its own, it leaves corners dark and creates overhead shadows. For a room that feels complete, add task lighting (table lamps, floor lamps) for focused activities and accent lighting (wall sconces, LED strips) for perimeter warmth. The three layers together reduce shadows, add depth, and give you full control over the room's mood.
How many light sources does a living room need?
Professional designers recommend 3–5 independently controllable light sources for a living room. A typical setup includes: a chandelier or pendant for ambient light, two table lamps flanking the sofa for task and supplementary light, a floor lamp by the reading chair, and one or two accent sources like picture lights or LED strips. Each source on its own switch gives you the flexibility to create different moods for different activities.
What dimmer setting should I use for my chandelier at dinner?
For weeknight family dinners, 60–70% brightness creates a warm, comfortable atmosphere. For dinner parties, dim to 35–40% and add candles for an intimate restaurant-like feel. For morning routines or homework at the table, 100% provides full task-level brightness. A dimmable chandelier with a Lutron-compatible dimmer switch gives you this full range — the same fixture serves every scenario.
Should all lights in a room be the same color temperature?
All light sources in the same room should be within 300 Kelvins of each other. A 2700K chandelier works well with 3000K accent lights — the difference is subtle and natural. Mixing 2700K with 4000K or higher creates a visible warm-cool clash that makes the room feel unsettled. The one exception is kitchen task lighting (under-cabinet lights), which can go to 3000K for better visibility while the island pendants stay at 2700K for warmth.
Related Guides
- Chandelier Color Temperature Guide: 2700K vs 3000K vs 4000K
- Chandelier Installation Cost Guide [2026]: DIY vs Electrician
- Best Chandelier for Every American Home Style [2026 Guide]
- Chandelier Shape Guide: Match Your Chandelier to Your Table
- 7 Common Chandelier Problems & How to Fix Them
- Do Chandeliers Increase Home Value? What Staging Experts Say
- LED vs Incandescent Chandelier: Energy Cost Comparison